
Prerequisites
Before you begin:- A SIP trunk with your carrier, and at least one number on it to use as a
caller ID, in E.164 format (
+15551234567). - The termination host and SIP credentials for that trunk. In Twilio these live under Elastic SIP Trunking.
- Admin access to your SLNG organisation. Creating a connection is a dashboard task, and the Telephony section is admin only.
- An agent to place the calls. Keep its ID for the API path. If you do not have one, see Create an agent.
- An SLNG key for the API path. See How to set up.
Create the connection
Open the Telephony section
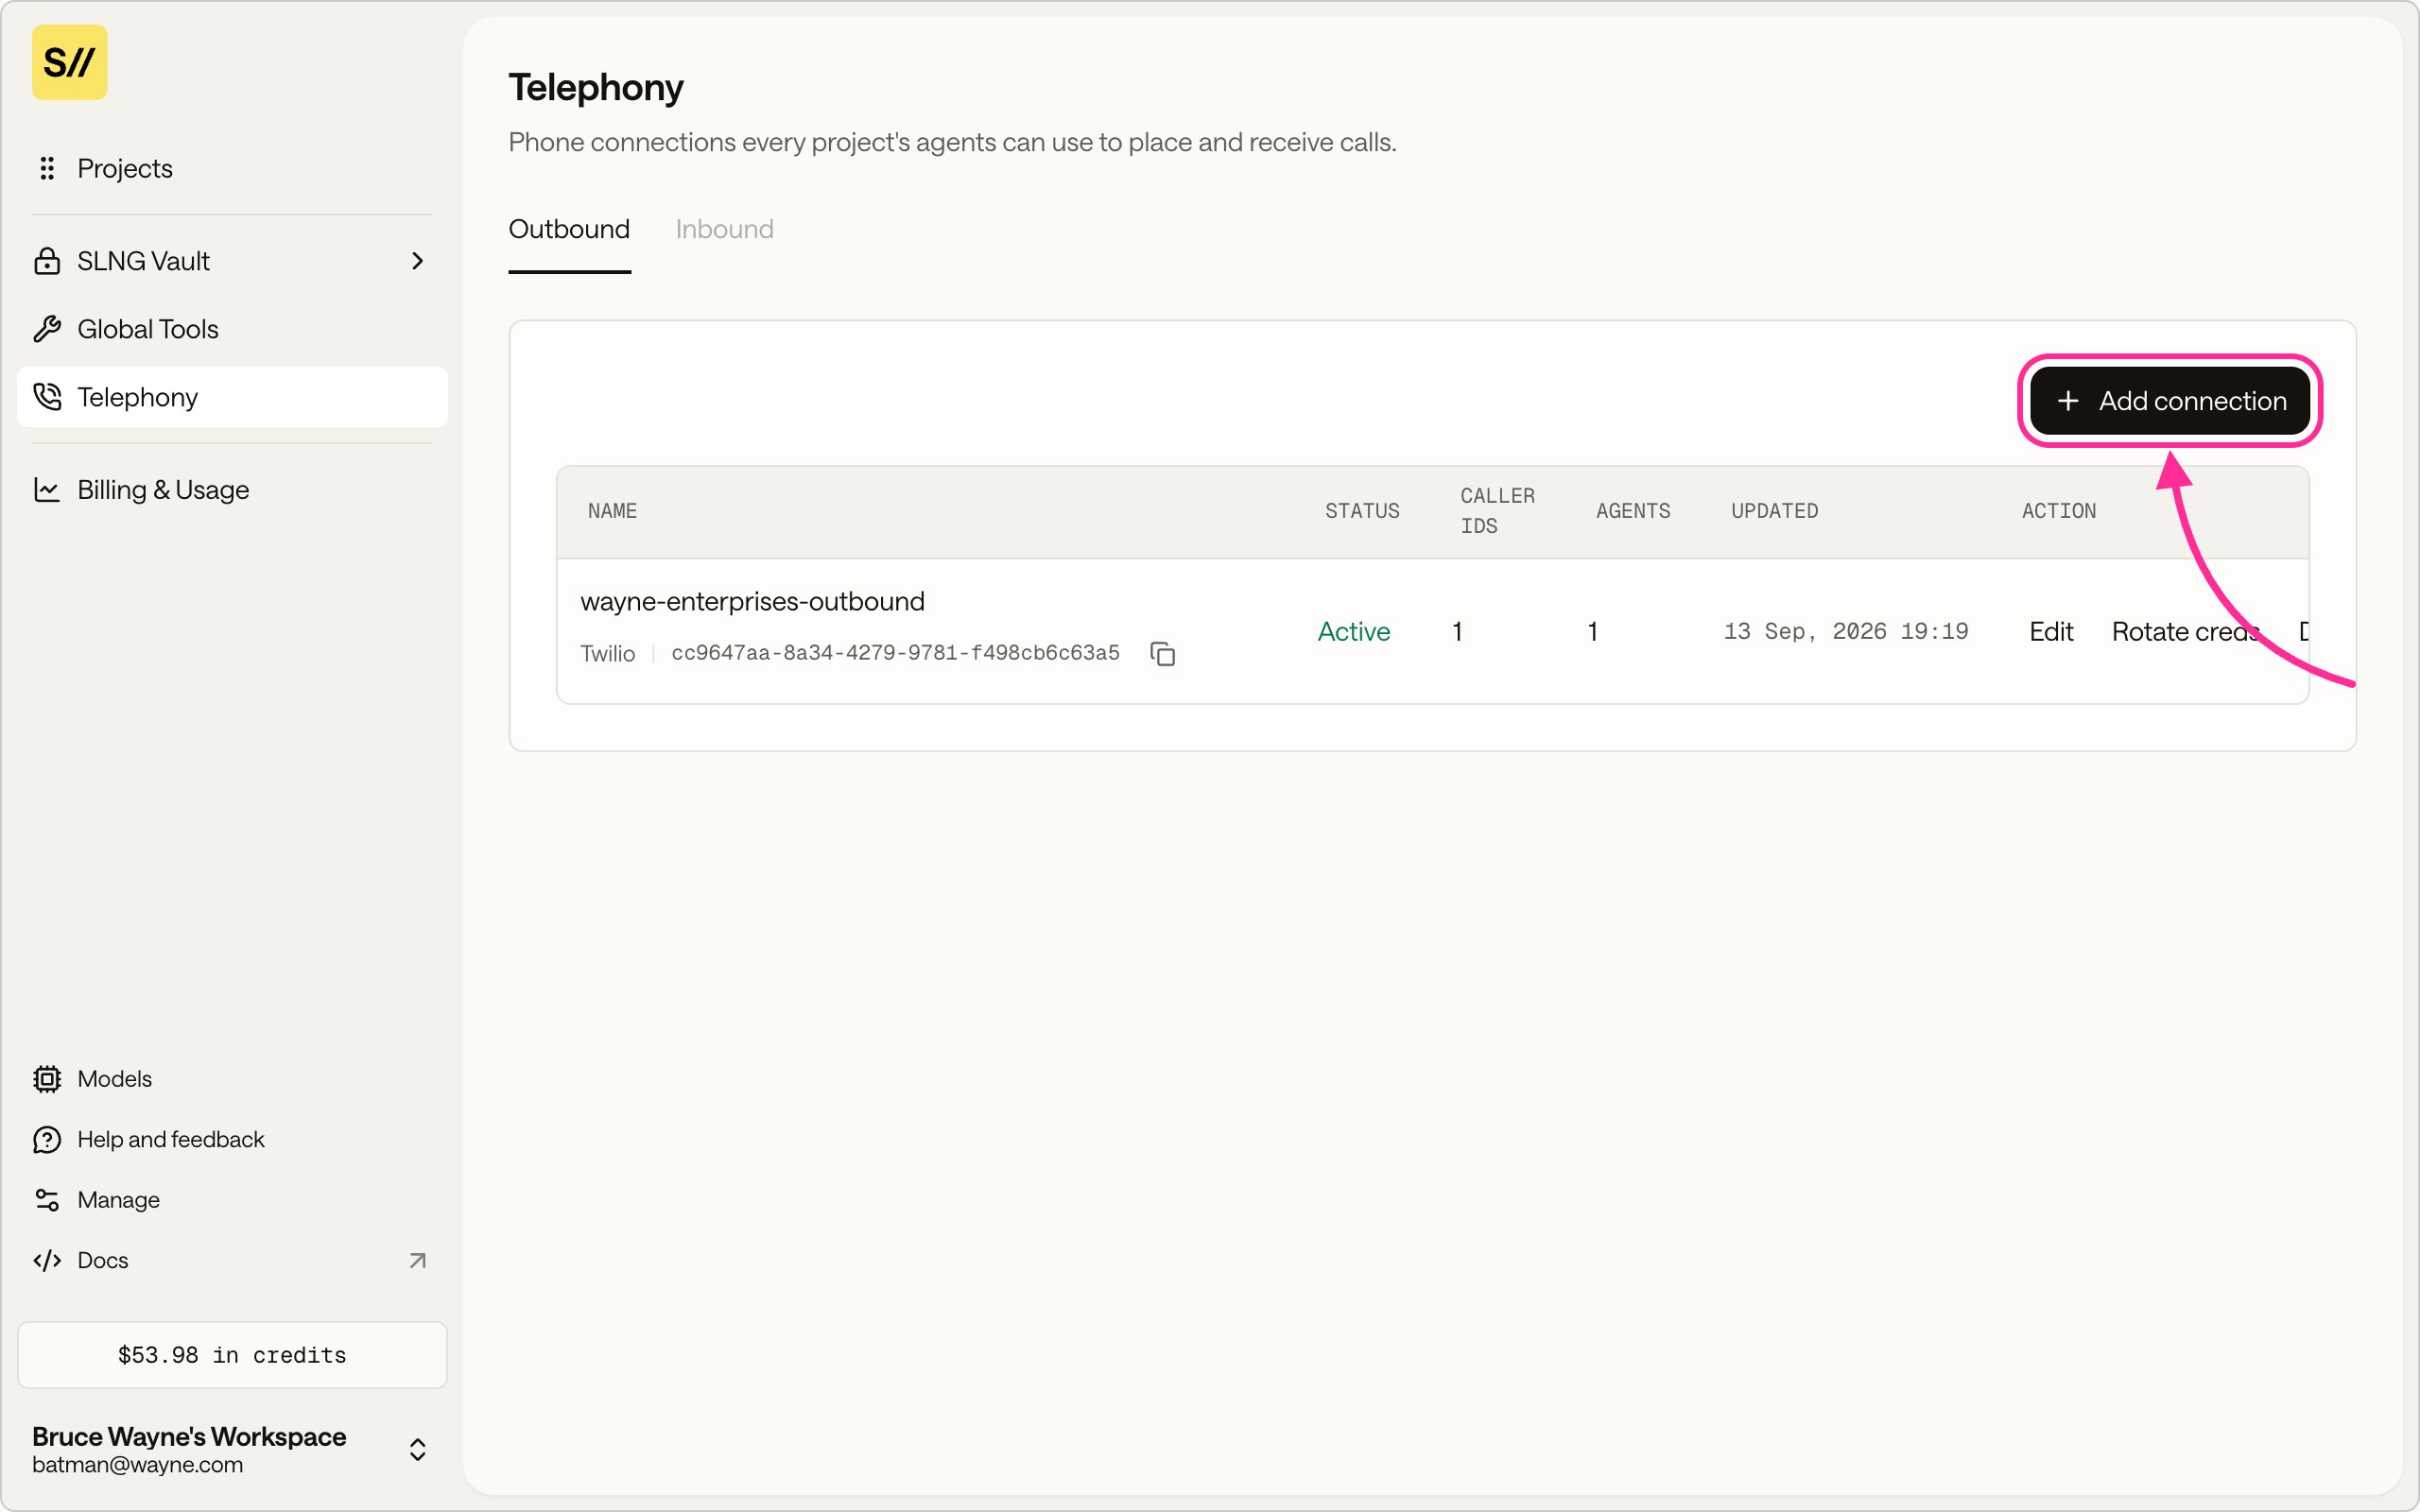
The Outbound tab of the Telephony section, with each connection's status and agents.
Name the connection and set the route
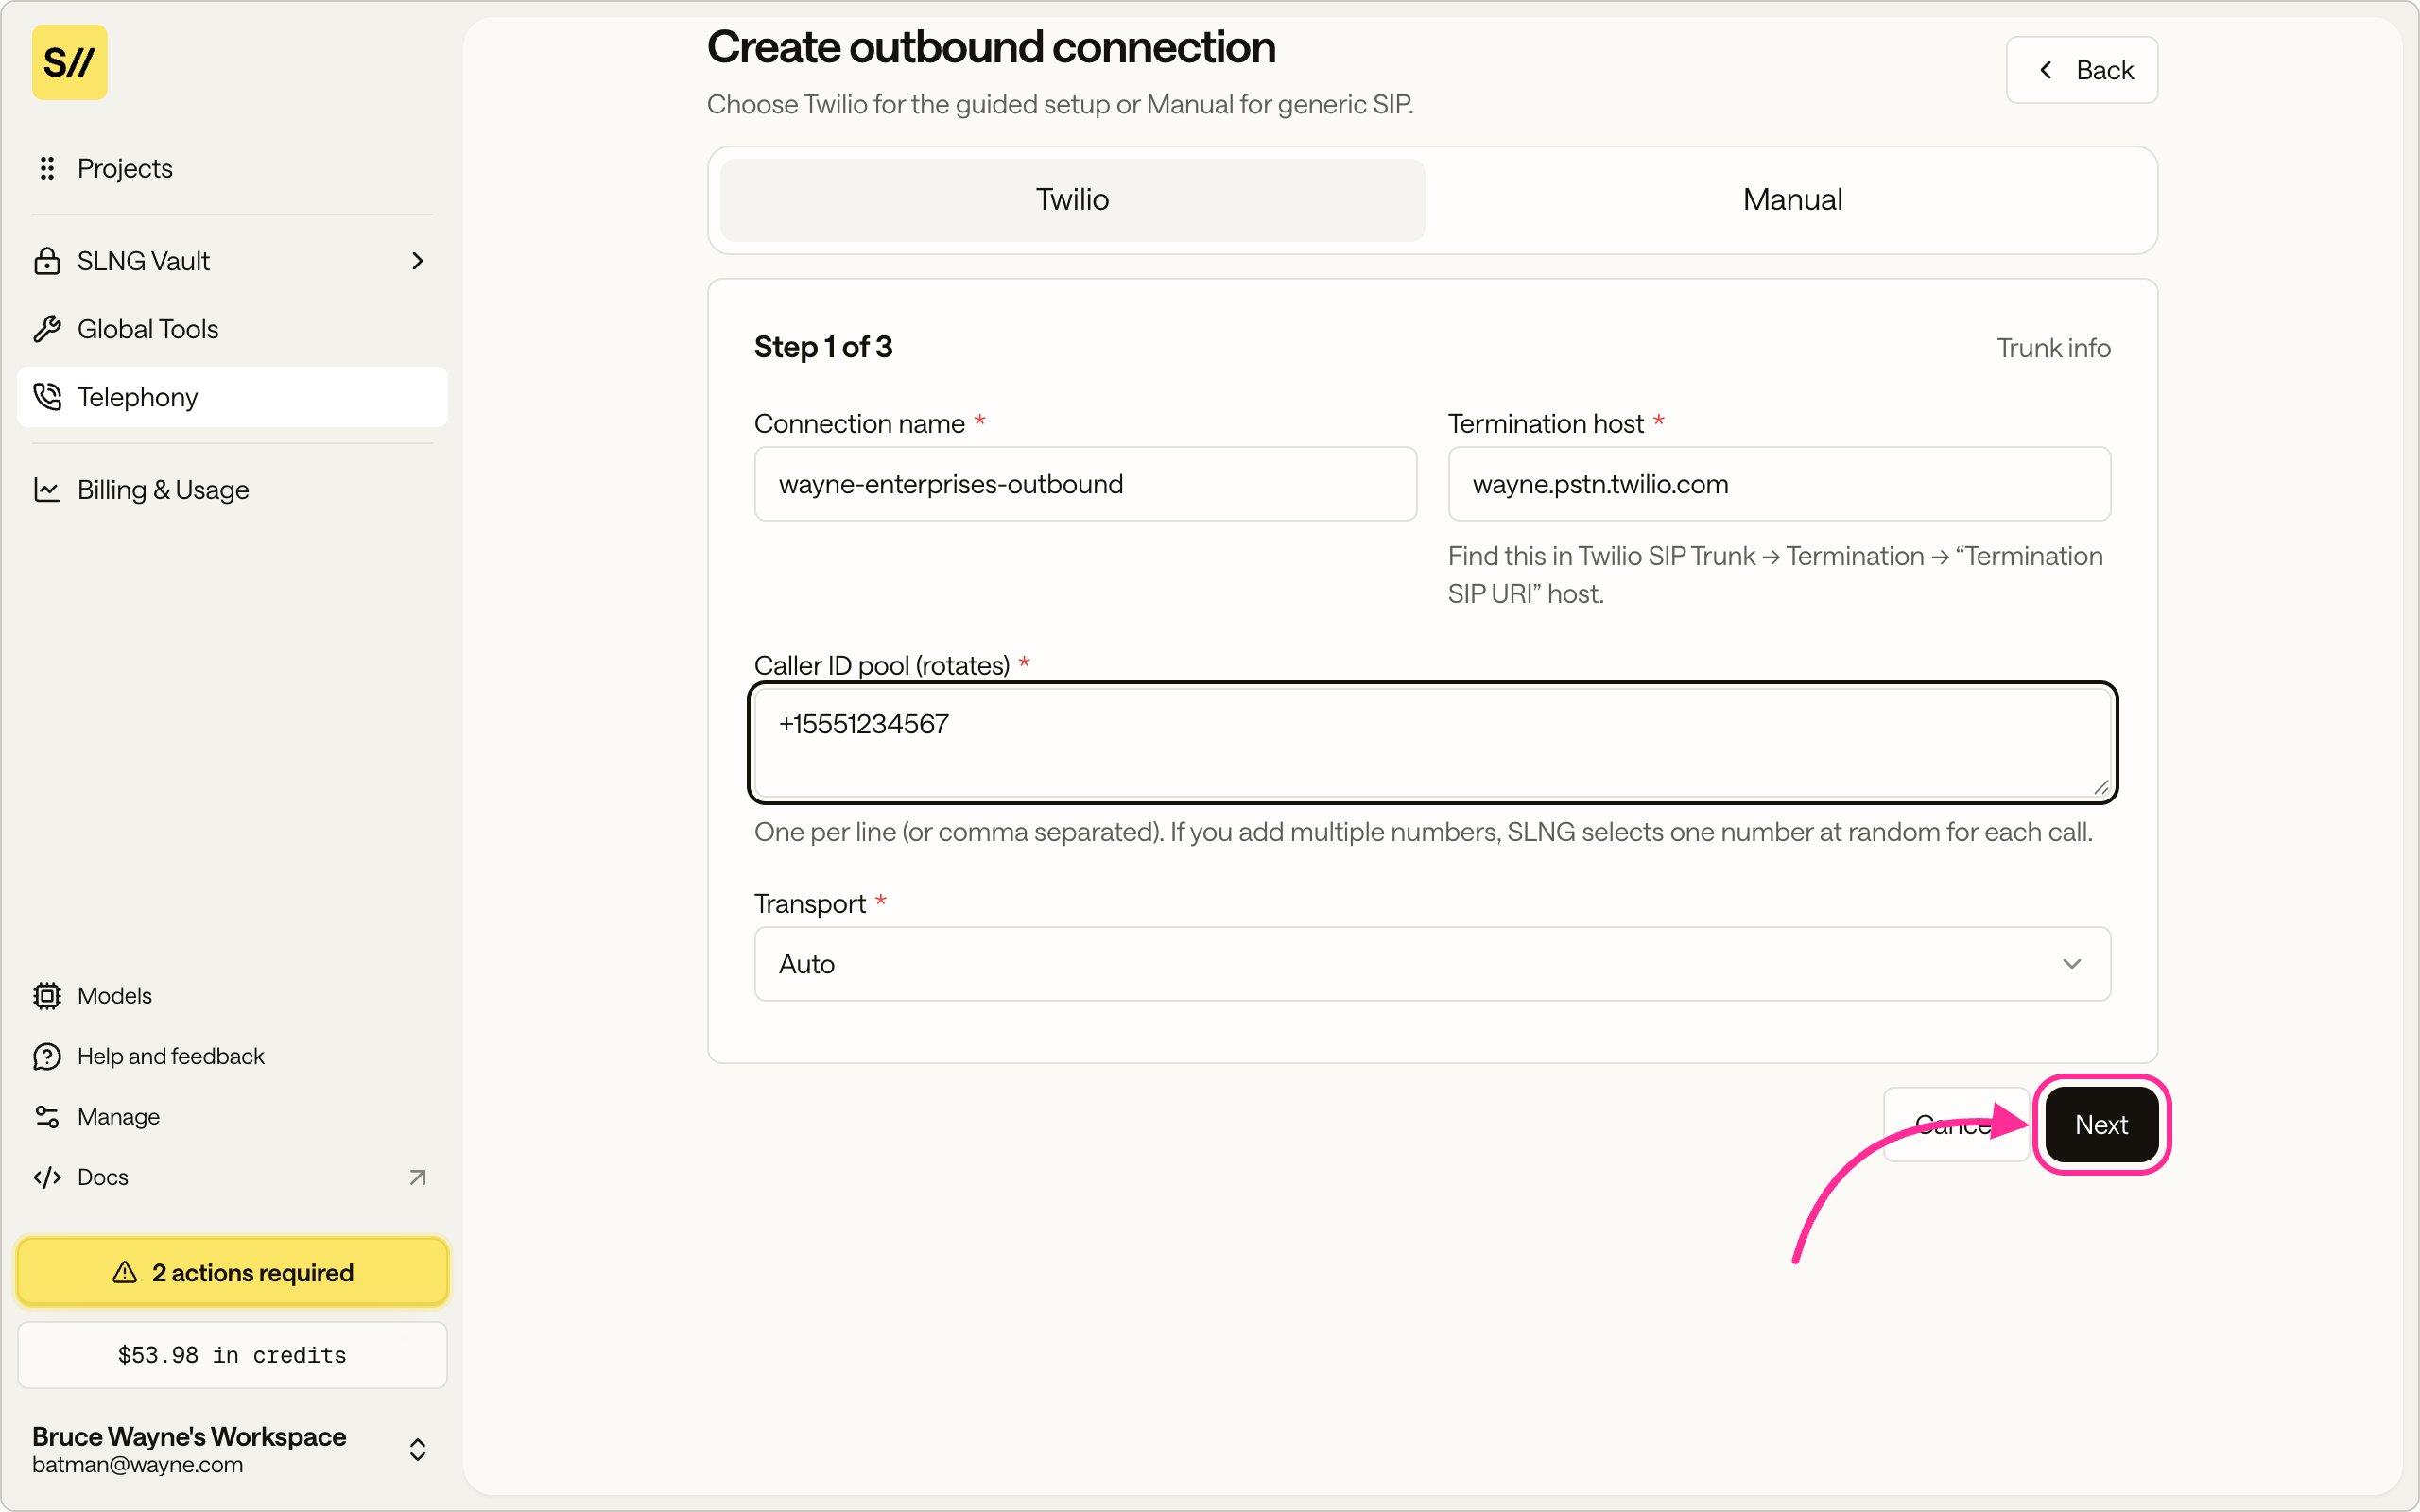
The first step of the outbound wizard: name, termination host, caller IDs, and transport.
Set the SIP credentials
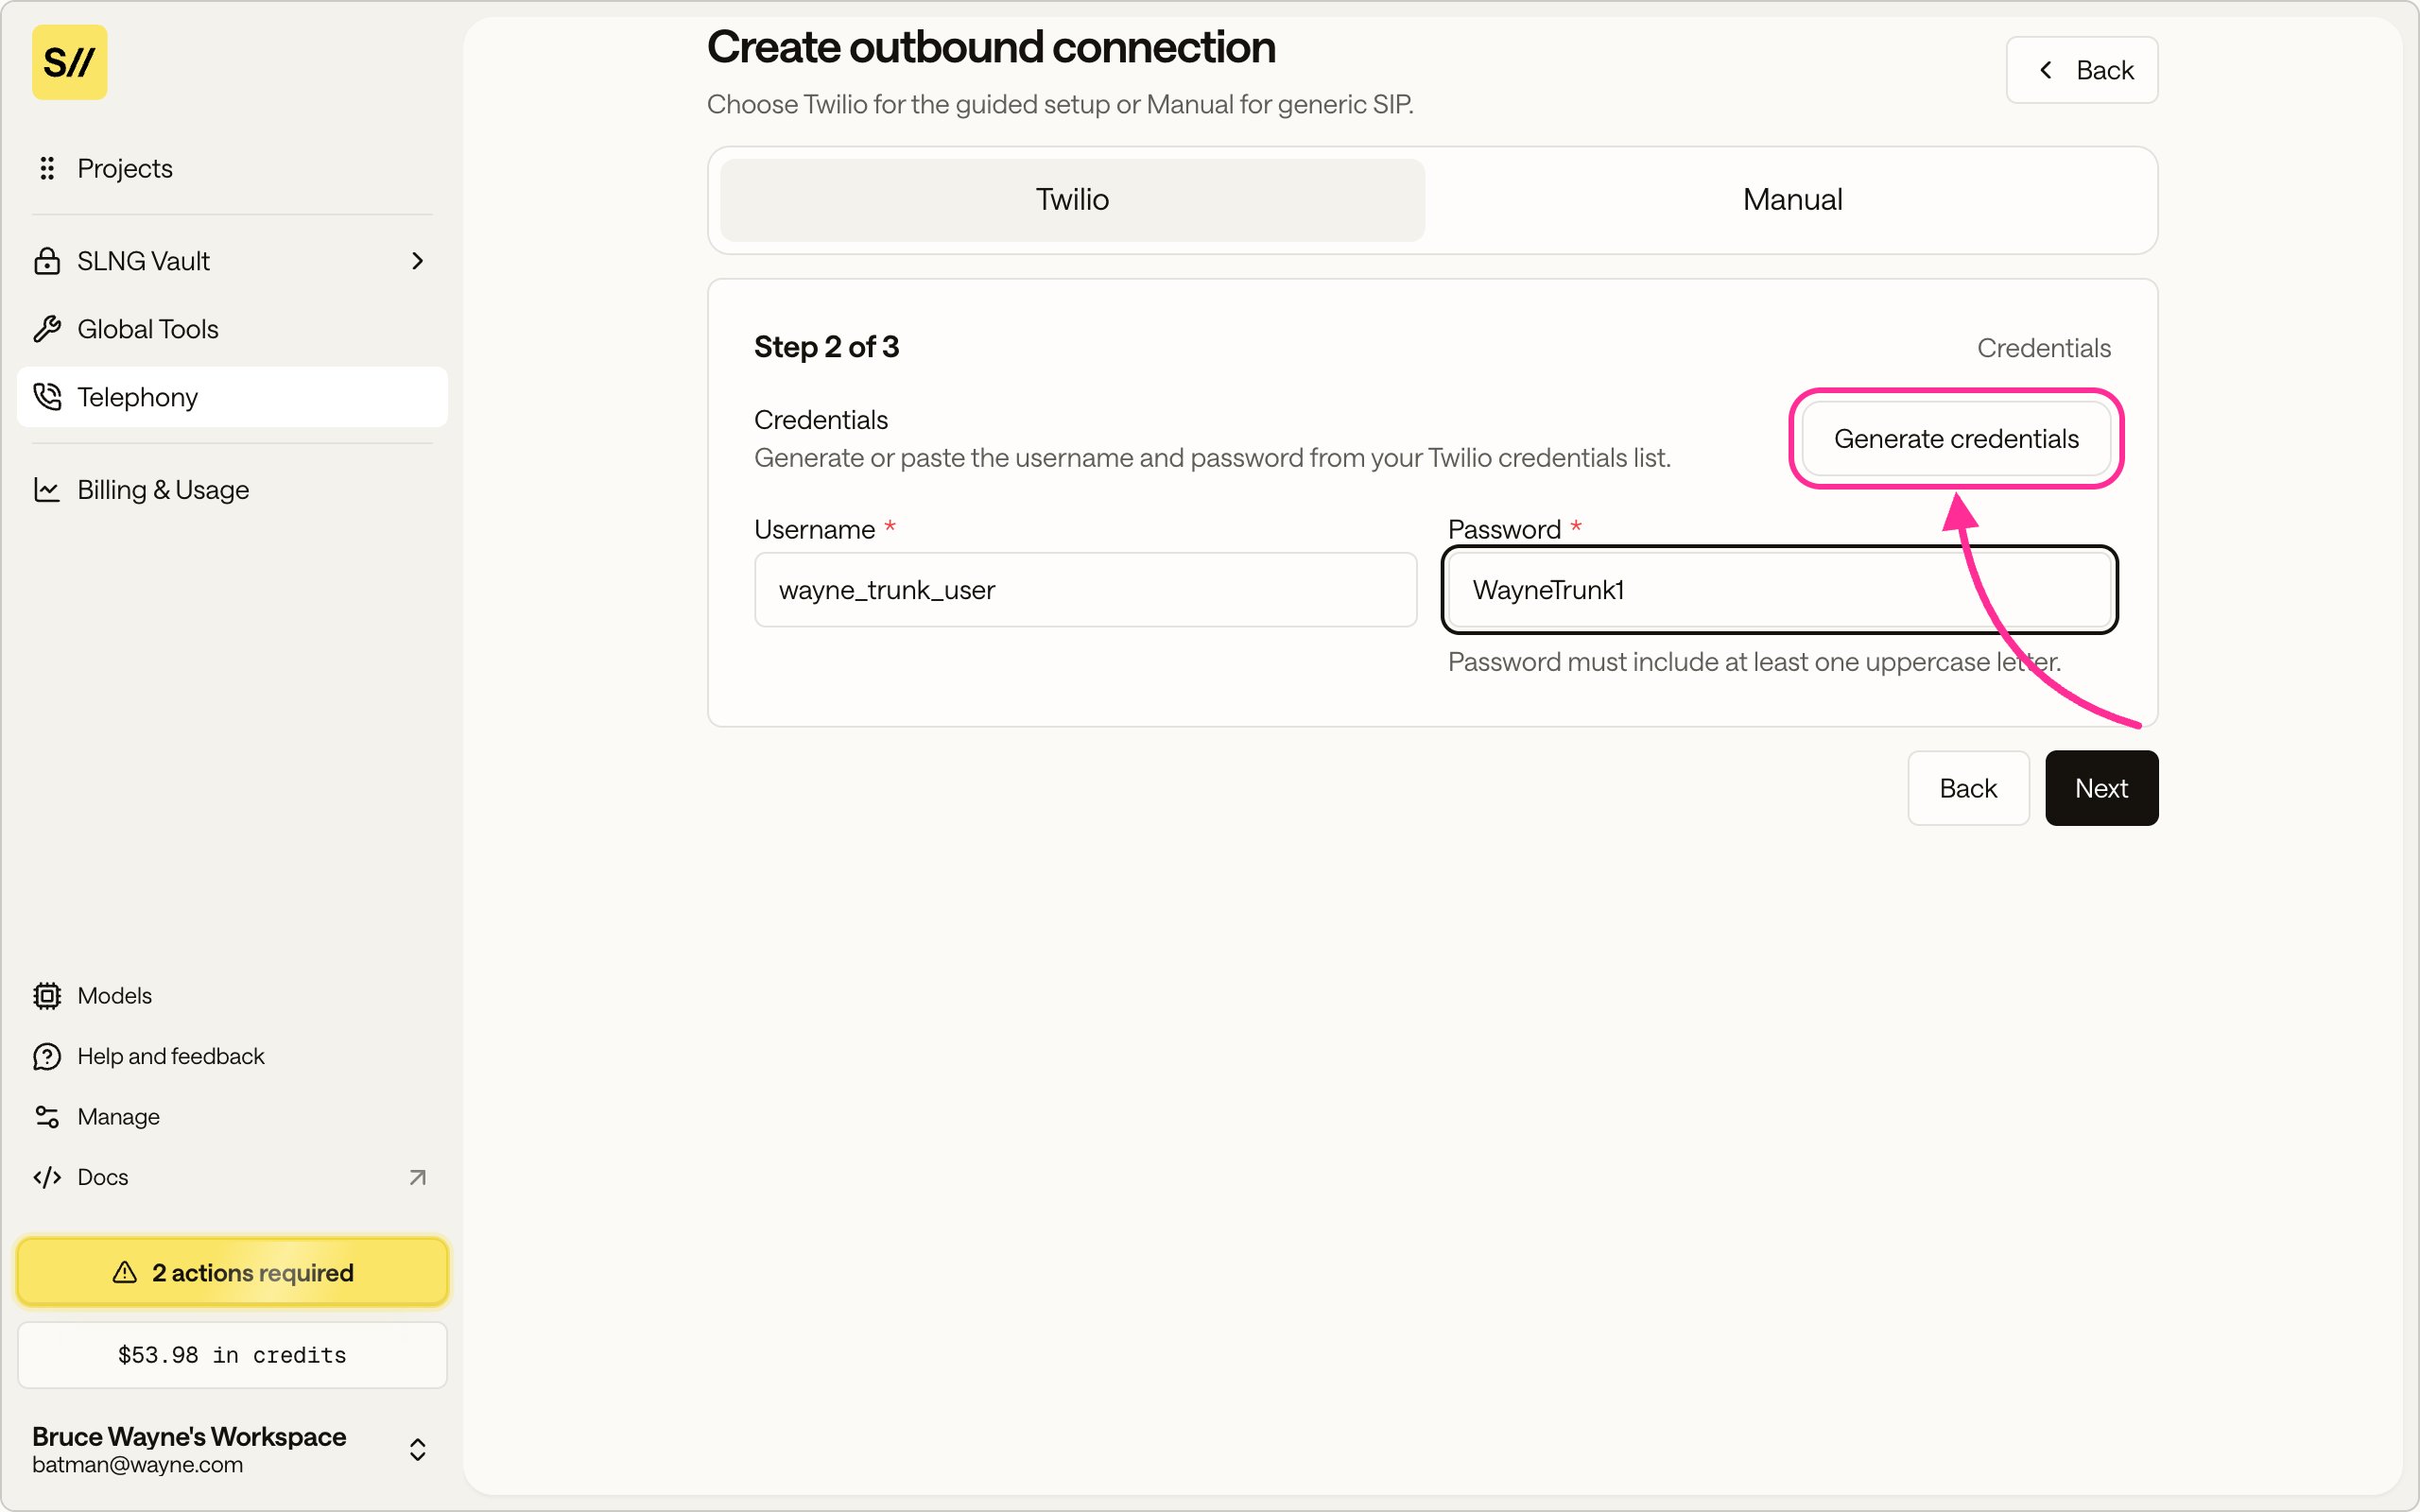
The credentials step, with the option to generate a username and password.
Finish the setup on your carrier
- Credentials List: add the username and password from the previous step.
- Termination: confirm the termination host matches what you entered.
- Numbers: confirm your Twilio number is attached to the trunk.
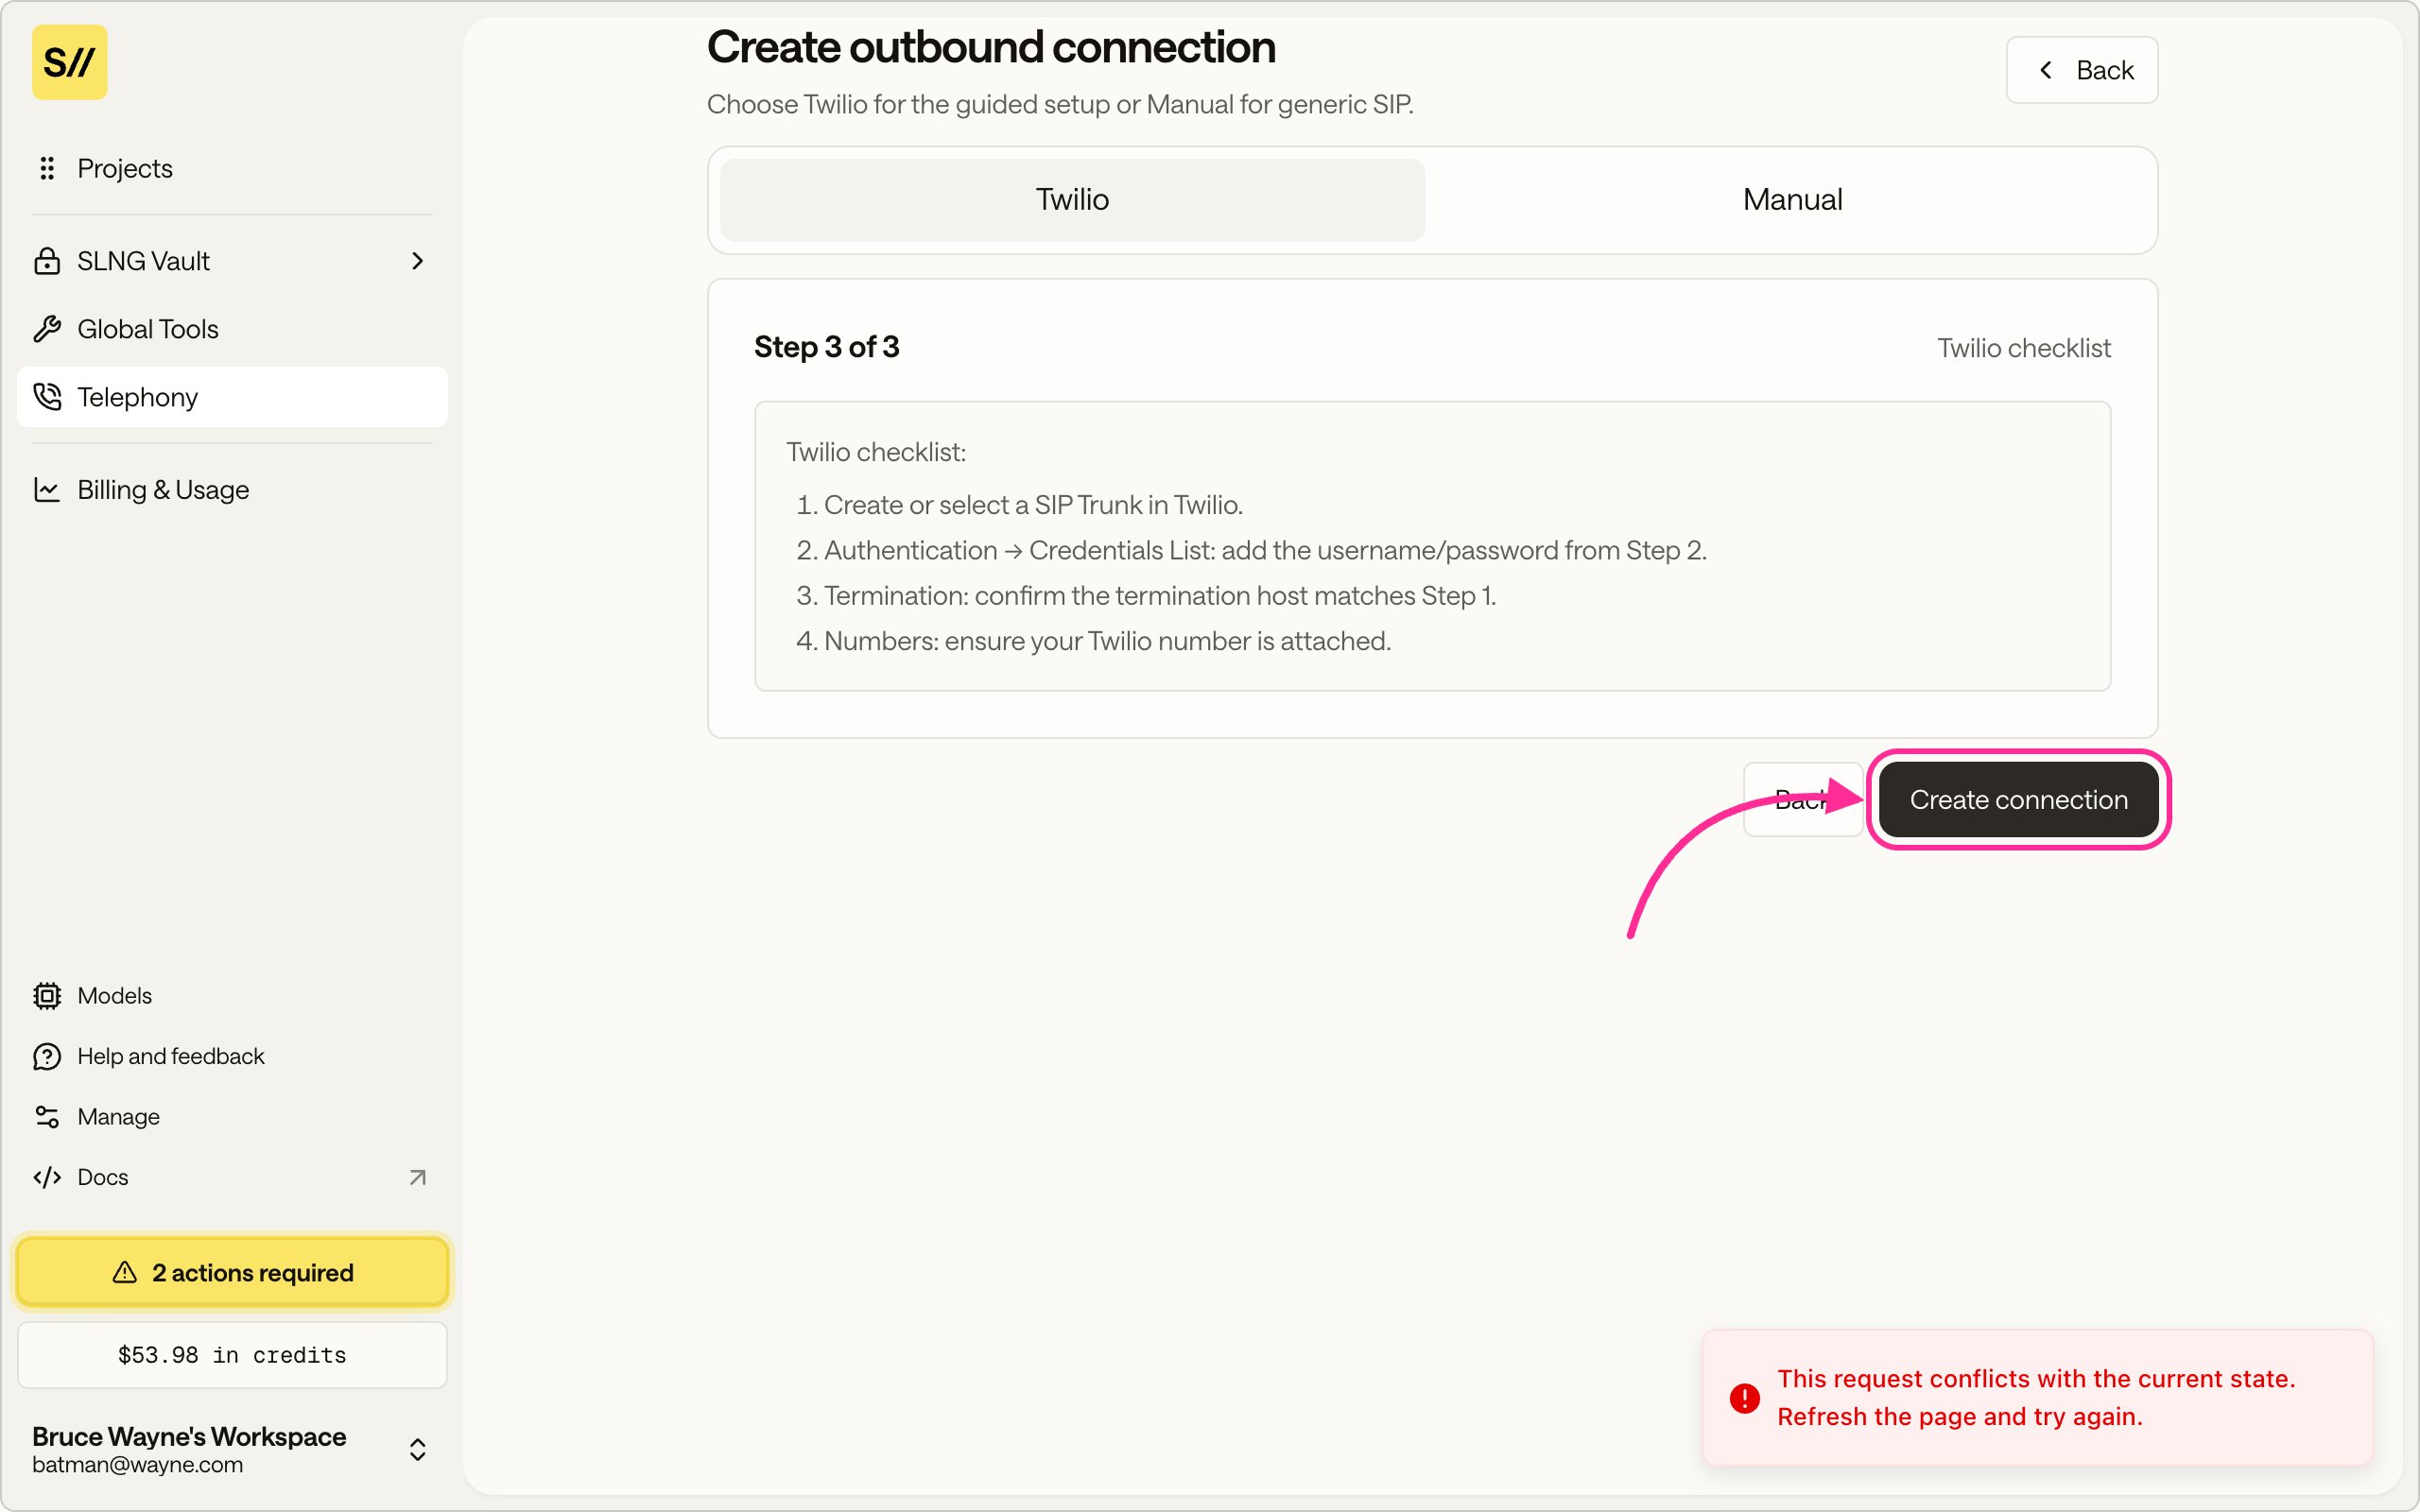
The final step lists the Twilio console tasks, then Create connection provisions the trunk.
Wait for the connection to become active
pending, then becomes active. If it ends in
error, the connection shows the reason. You cannot attach a connection to
an agent until it is active.How the caller ID is chosen
An outbound connection can hold more than one number. The caller ID is selected at random from this pool for each call. Edit the connection to add or remove numbers. The caller ID always comes from this pool. A dispatch request sets the destination number, so give a campaign that needs a specific caller ID its own connection.Attach the connection to an agent
- Dashboard
- API
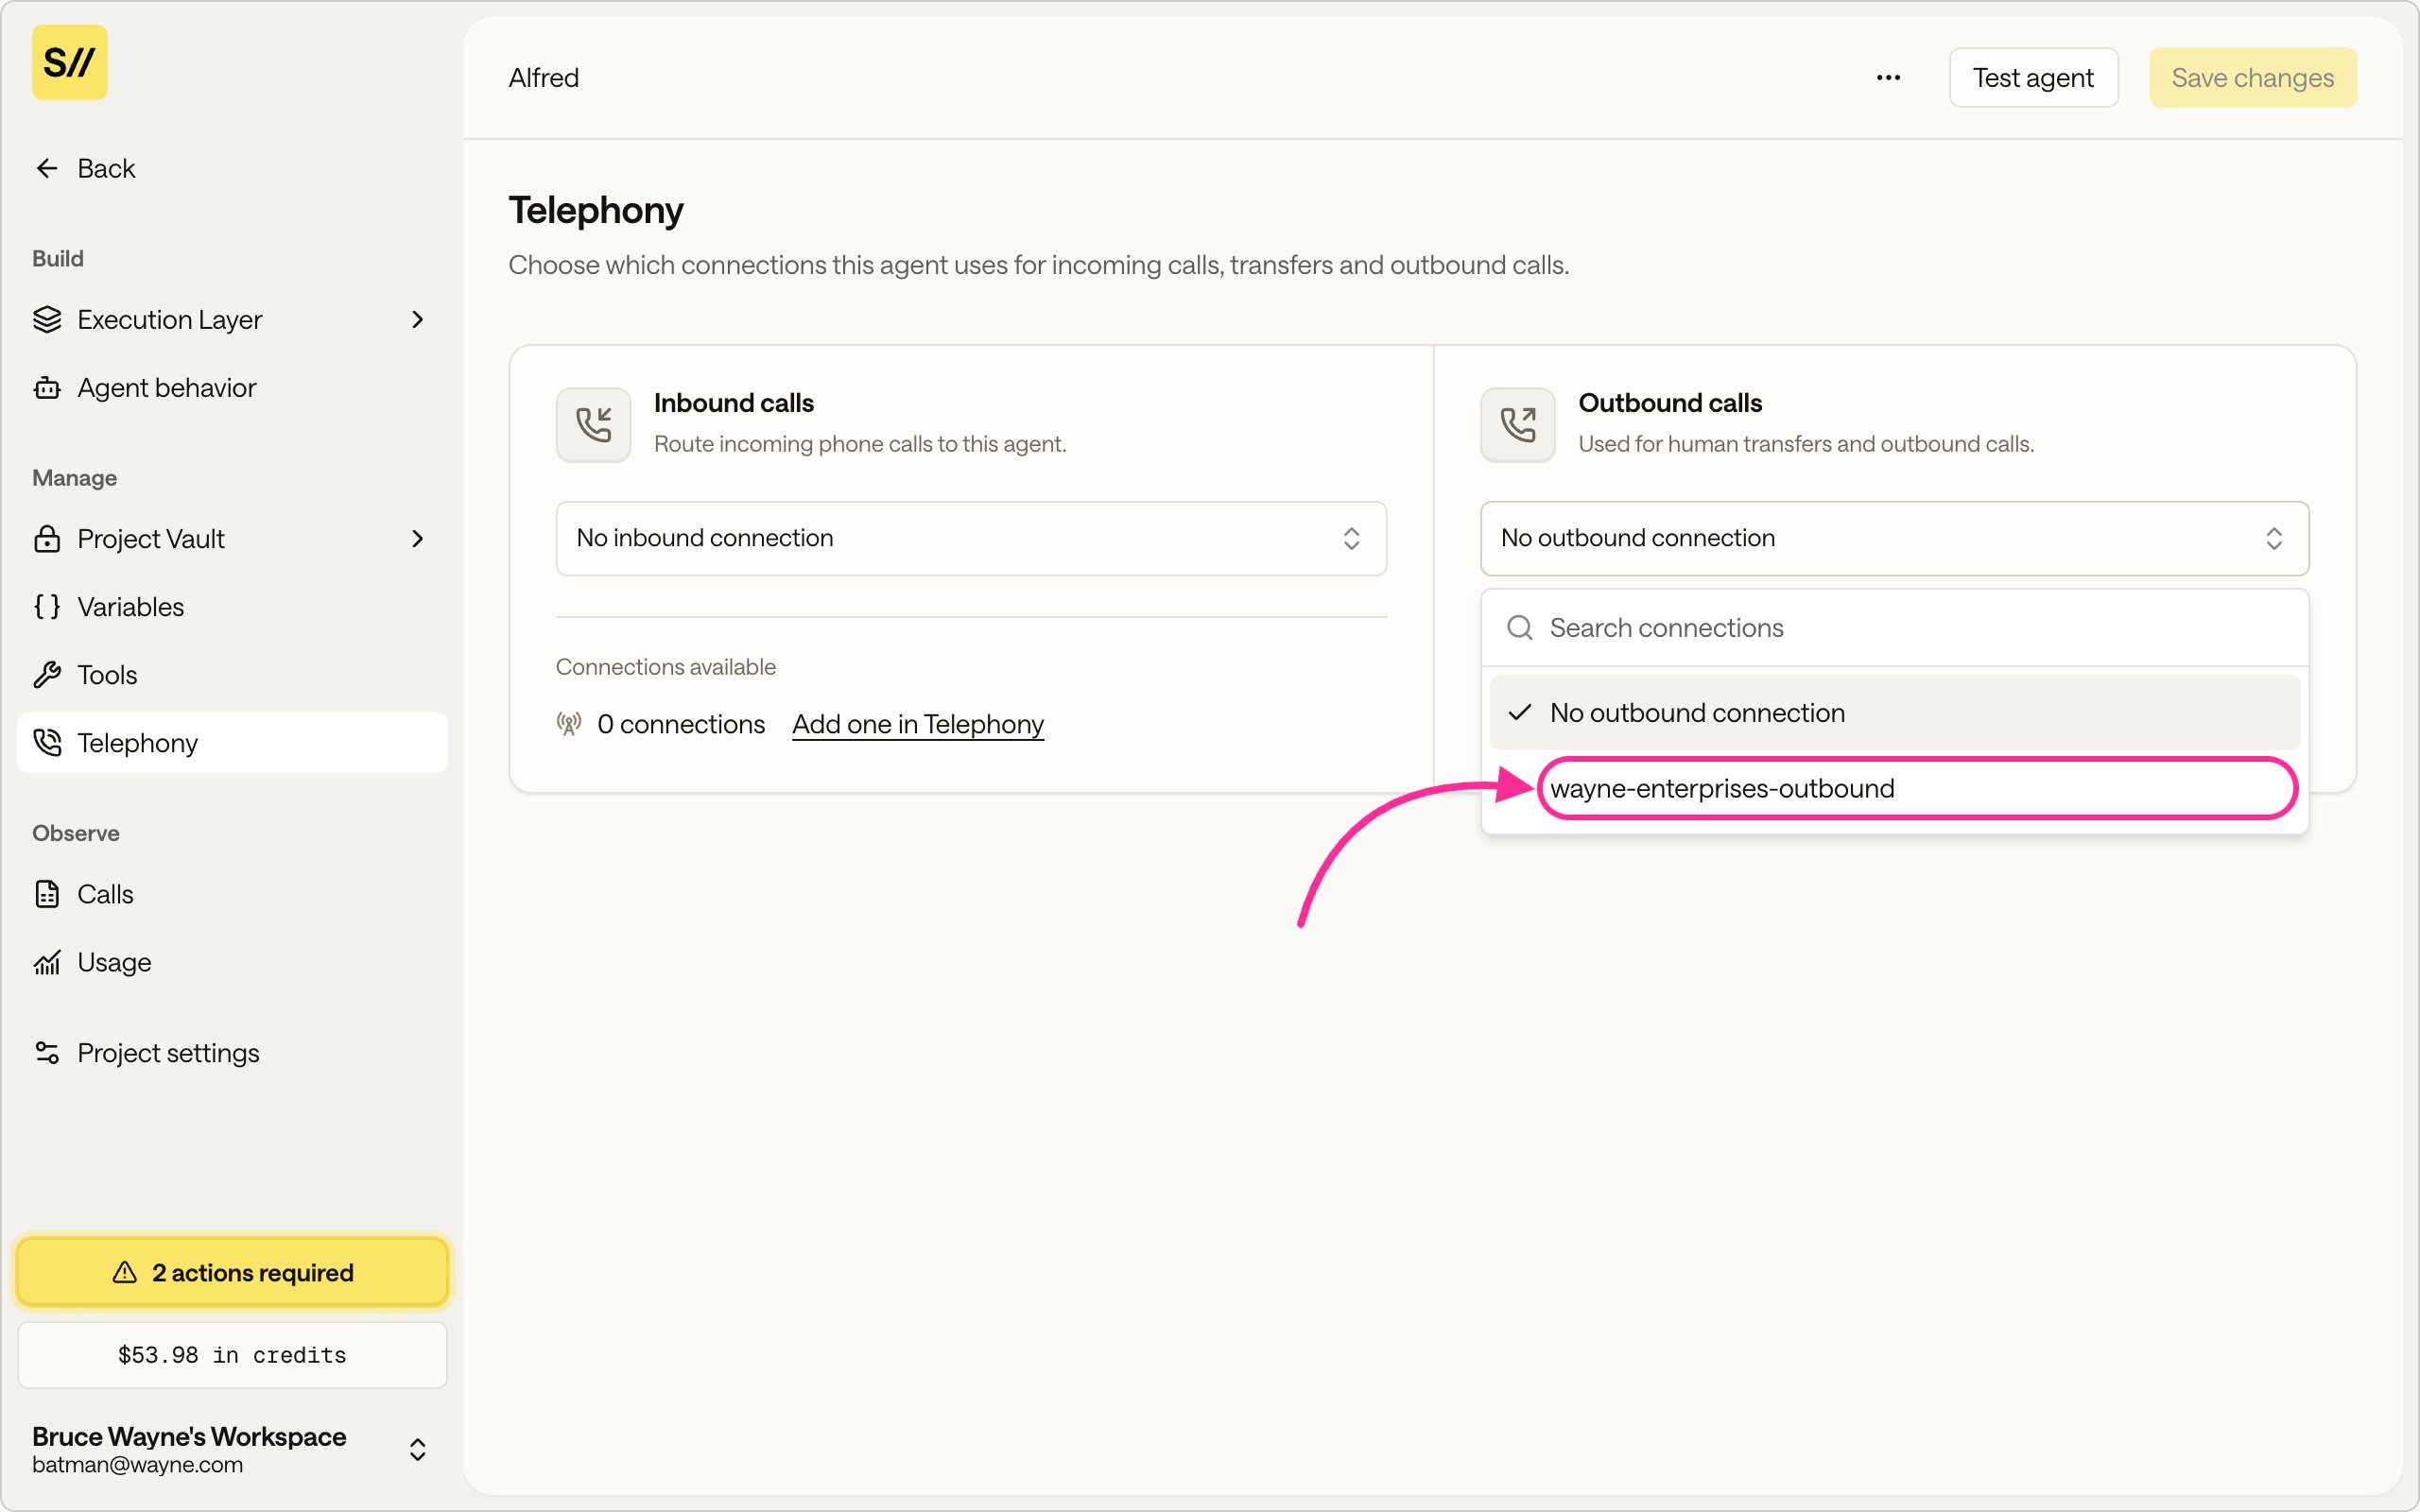
The project's Telephony section, with the outbound connection picker open.
Verify outbound calls
Use Dispatch outbound calls to call a number you can answer. Confirm that the phone rings, the caller ID belongs to the connection’s pool, and the agent usesoutbound_greeting when you have set one.
If the call fails, confirm that the connection is active, attached to the
agent, and configured with credentials that your carrier accepts.
What an outbound connection is required for
With one attached, the agent can:- Be dispatched on a call. See Dispatch outbound calls.
- Use
outbound_greeting, so a person the agent called hears a different opening line than someone who dialled in. Directional greetings need at least one connection attached, and the agent fails to save without one. - Use the Transfer Call tool, which places an outbound call to reach a person.
Rotate the credentials
For a Twilio connection, keep the old credentials in Twilio until you verify the new pair:Generate a new pair
Add the pair to Twilio
Activate the new credentials
Verify and remove the old pair
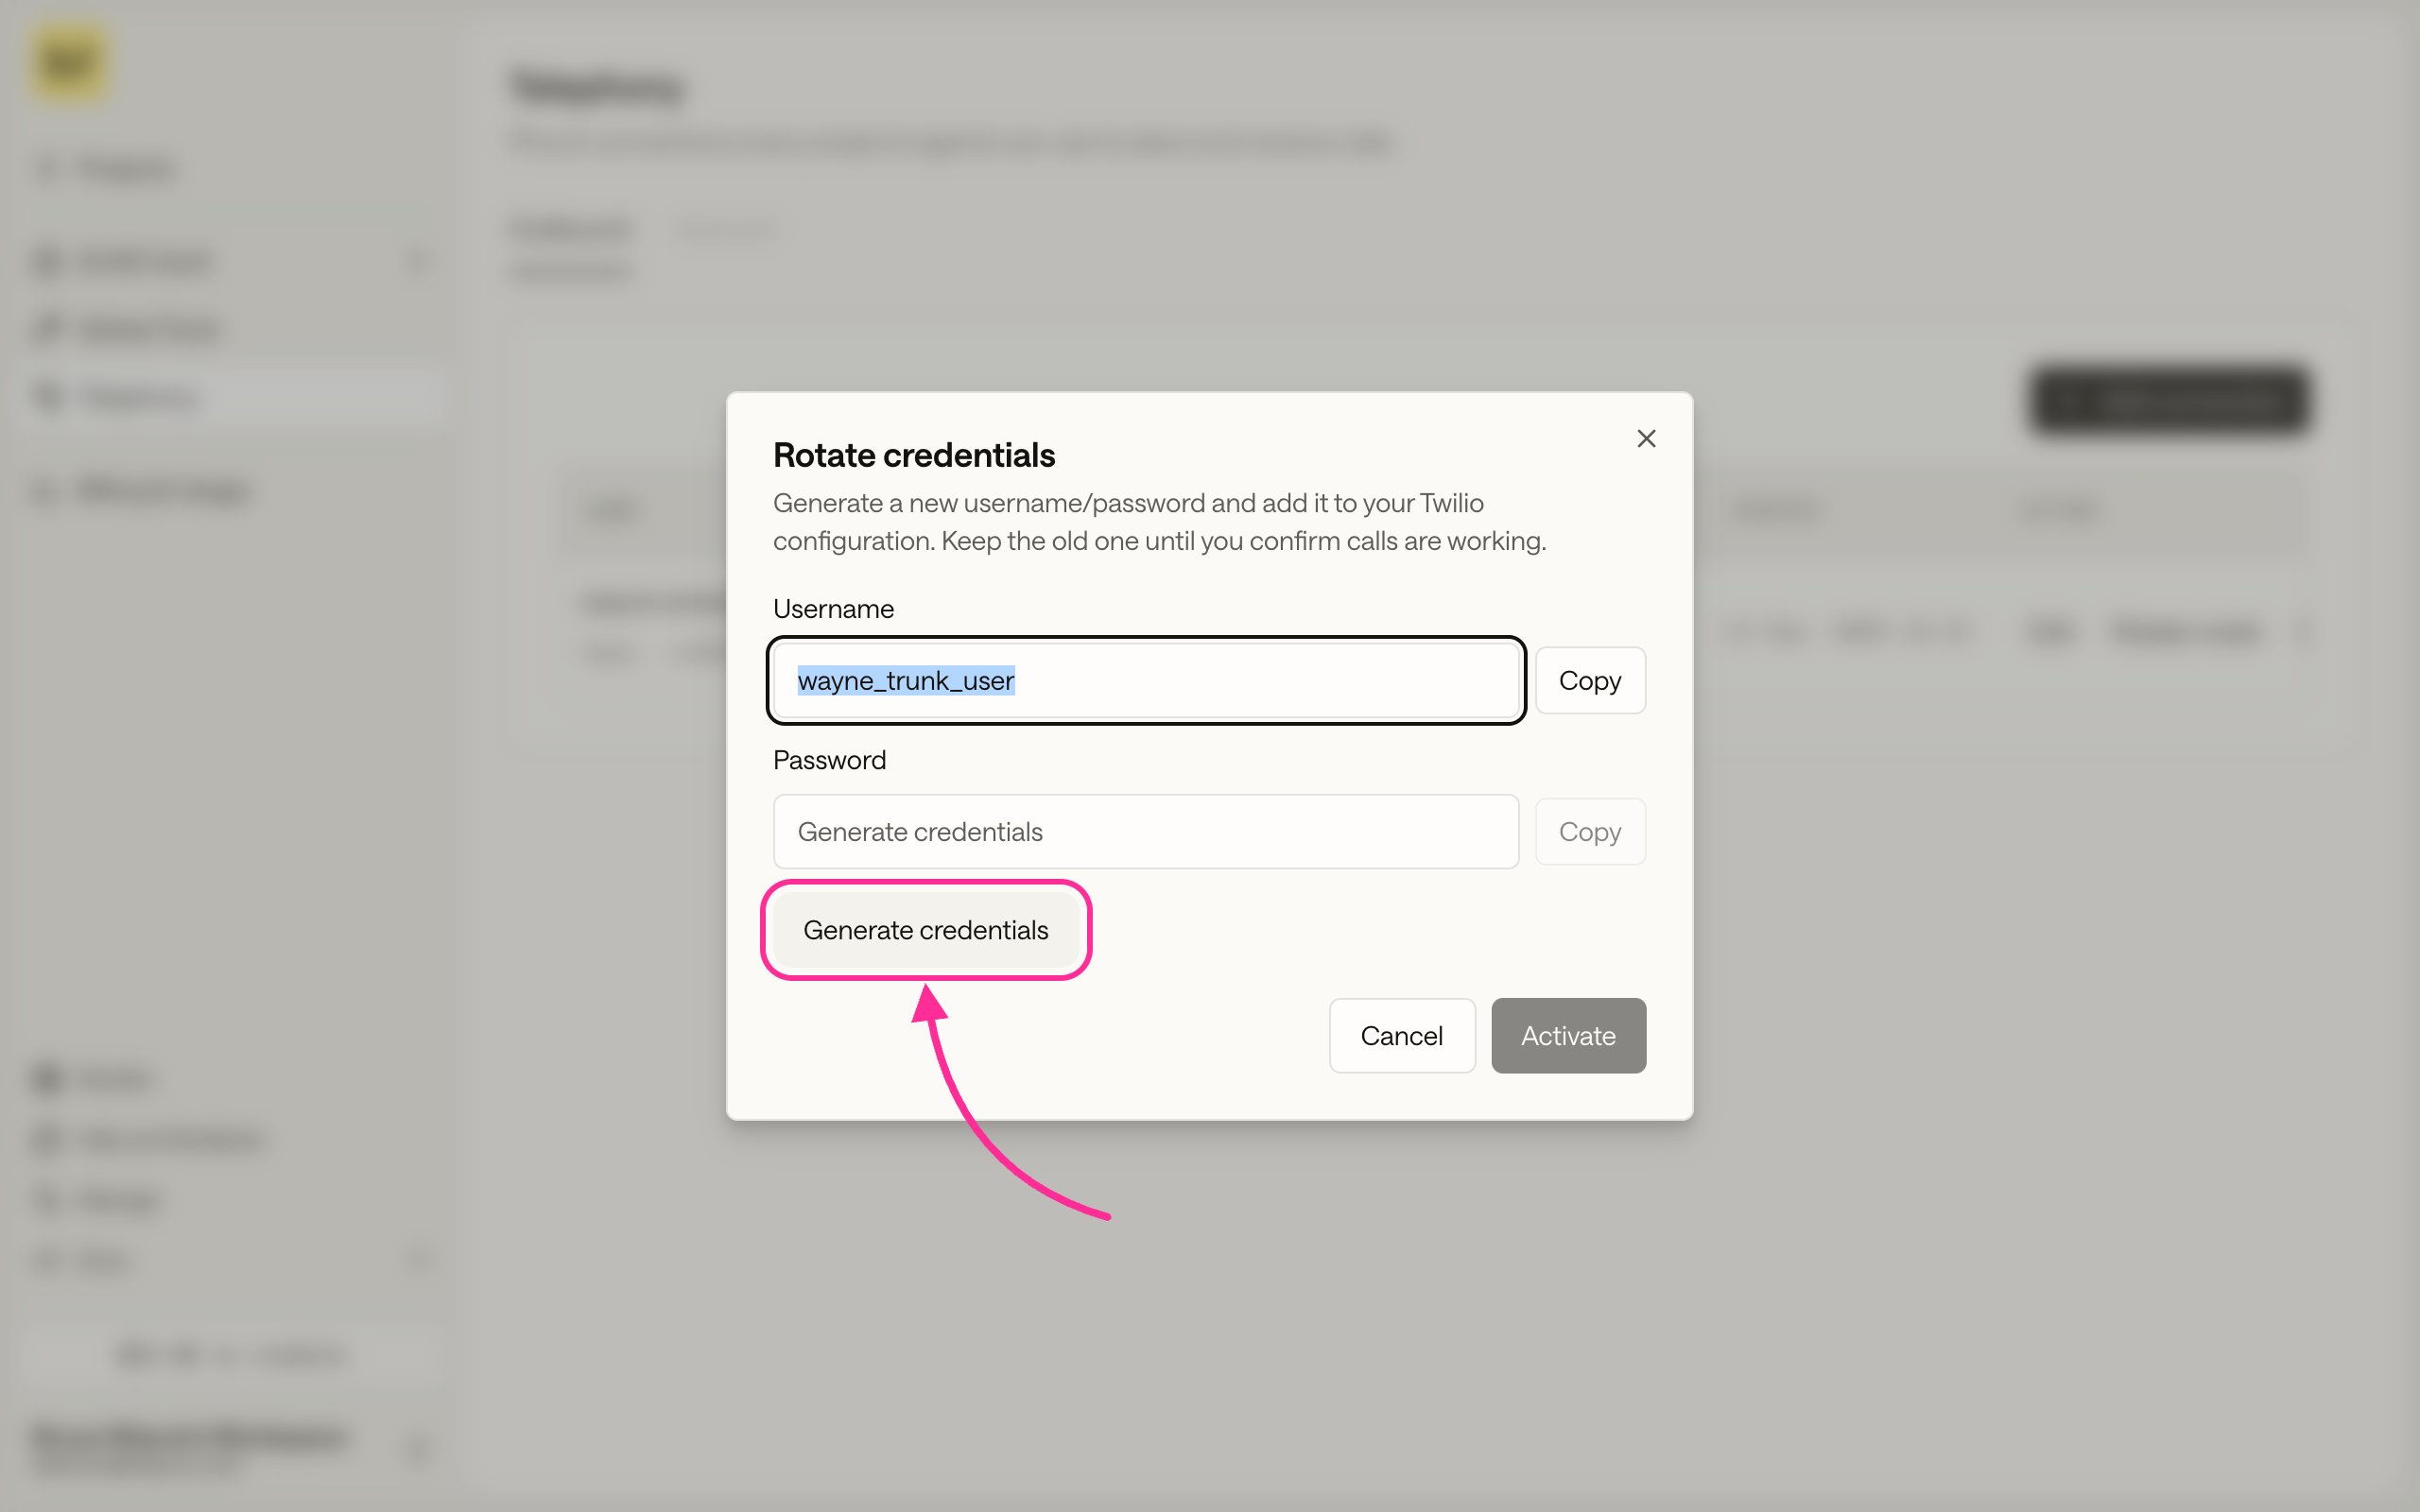
Rotate creds generates a new username and password. Update Twilio before you activate it.
Next steps
- Dispatch outbound calls to place the first one.
- Receive calls on a number if callers also dial the agent.